User Tools
Sidebar
Navigation
software:gui-designer:system-manager:feedback-parsing:regex-examples
Table of Contents
Regex Examples
Source Selection Feedback
It is quite common to want to indicate which source is currently selected by way of making a button active. Below is an example of data sent from an Opus system indicating which source is selected:
#11U0101!
#11U0102!
#11U0103!
....
#11U0108!
Each line is a different message the Opus system would send back depending on which source was selected (1 to 8).
Now, we need to parse this source selection so that only one of the 8 source select buttons is active at any one time. This is done by using the following regex syntax:
#11U010(\d)!
Notice the round brackets and digit specifier - this means 'capture a single digit character' at the position of the message before the exclamation mark.
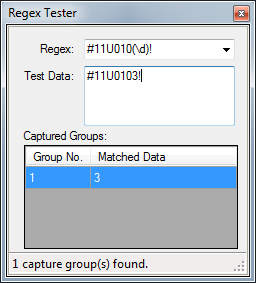
Regex Tester
You can use the Regex Tester in guiDesigner to test your regex pattern and ensure the correct data is captured when any of the 8 different messages from Opus come through the feedback system.

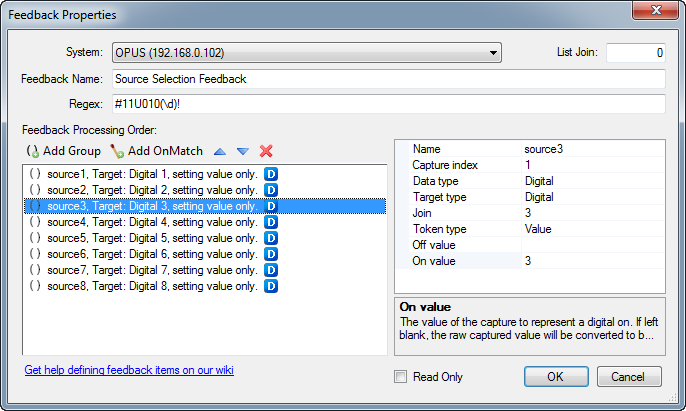
Feedback Properties
Once you have this regex perfectly written, you need to assign a Feedback Parsing item in the System Manager to use this regex and assign the capture groups to join numbers.
To do this, you click on the 'Add Feedback' button in the System Manager toolbar.

Add a capture group for each expected source selection value that could be returned by the device. In this example there are 8 possible sources, so we have created 8 capture groups, all referencing 'capture index' 1. This means 'reference the data captured by the first set of round brackets in the regex'.
Notice the 'Off Value' is always left empty - this ensures when there is any value other than the 'On Value' captured, the assigned digital join will go low (inactive button state).
Also notice the 'On Value' is assigned the actual value that will be captured by the regex when we want to set the assigned digital join high (active button state).
If this was left empty as well, then the assigned digital join is set to either low or high depending if the captured value results in a 0 or 1 by forcing the captured value to return a boolean (0 or 1) value.
Assigning Join Numbers
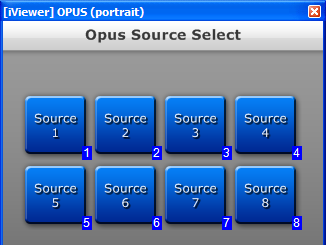
In the above Feedback Properties example, notice the join numbers 1 through 8 are assigned, and they are set to 'Digital' type. These join numbers can then be assigned to a button in your GUI to change the state of the button when the feedback is processed from the system.
Simply create 8 buttons on a page and assign then join numbers 1 through 8 using the 'Click assign digital join' tool in the main toolbar (much quicker than editing all button properties manually).

software/gui-designer/system-manager/feedback-parsing/regex-examples.txt · Last modified: 2013/07/01 12:39 by terrylau
