User Tools
Sidebar
Navigation
hardware:sw16
Table of Contents
SW16
The CommandFusion SW16 is a 16 input switch interface, with 16 dimmable status LED outputs and 4 dimmable backlight LED outputs.
Using the inputs you can trigger rules, essentially using macros to control anything within the CFLink network.
The SW16 is designed to be used with any keypad, custom or off the shelf.
Quick Reference Guide
The SW16 Quick Reference Guide provides the basic information required to get started on a printable, black and white document that can be easily taken with you to a job site. Find the SW16 Quick Reference Guide here.
Information Panel
The information panel can be found on the top of the SW16.
LEDs
- Power (Blue)
- Off = Power off
- Flashing = Booting or firmware missing
- Solid = Power on and ready
- CFLink Fault (Red)
- Solid = Fault discovered on CFLink bus. Remain solid until reset.
- Reset unit to clear CFLink fault flag and turn off LED.
- CFLink Activity (Amber)
- Flashing = CFLink activity is detected on the CFLink network.
- Input (Amber)
- Solid = One or more of the dry contact inputs is closed.
- Off = All dry contact inputs are open.
- LED (Amber)
- Solid = One or more of the status LED outputs is on.
- Off = All status LEDs are off.
- BLight
- Solid = One or more of the backlight LED outputs is on.
- Off = All backlight LEDs are off.
Pinhole Buttons
- Setup
- Only used for Factory Reset.
- Reset
- Press to reset the unit. See the Device Resetting page for more information.
Ports
40 Pin Header
The 40 pin header on the front of the unit has pins allocated for all the dry contact inputs and LED outputs, as well as one pair for the LED supply voltage levels and one pair for ground.
The SW16 ships with a ribbon cable ready for use.
Pinout
- Input 1 +
- Input 2 +
- Input 3 +
- Input 4 +
- Input 5 +
- Input 6 +
- Input 7 +
- Input 8 +
- Input 9 +
- Input 10 +
- Input 11 +
- Input 12 +
- Input 13 +
- Input 14 +
- Input 15 +
- Input 16 +
- Status LED 1 Cathode (-)
- Status LED 2 Cathode (-)
- Status LED 3 Cathode (-)
- Status LED 4 Cathode (-)
- Status LED 5 Cathode (-)
- Status LED 6 Cathode (-)
- Status LED 7 Cathode (-)
- Status LED 8 Cathode (-)
- Status LED 9 Cathode (-)
- Status LED 10 Cathode (-)
- Status LED 11 Cathode (-)
- Status LED 12 Cathode (-)
- Status LED 13 Cathode (-)
- Status LED 14 Cathode (-)
- Status LED 15 Cathode (-)
- Status LED 16 Cathode (-)
- Backlight LED 1 Cathode (-)
- Backlight LED 2 Cathode (-)
- Backlight LED 3 Cathode (-)
- Backlight LED 4 Cathode (-)
- Voltage supply 3.3V DC max 500mA - To Anode (+) of LEDs
- Voltage supply 5V DC max 1A - To Anode (+) of LEDs
- Ground
- Ground
Note: Share pin 37 or 38 (depending on what voltage your LEDs require) to the Anode (+ve, longest pin) of all LEDs. Cathode (-ve, short pin) for each LED should be connected to the appropriate LED pin on the SW16.
Note: If using RGB LEDs, make sure they are the 'common anode' type. Then pin 37 or 38 (depending on LED voltage) can be used for anode and each RGB cathode is connected to individual LED pins (17-36).
Note: If LEDs require voltage higher than 5V DC, an external power supply can be used up to 30V DC. Simply connect external power +ve to the Anode pins of the LEDs, and the external power supply -ve to pins 39 or 40 (ground) of SW16. Cathode of LEDs still connects to the appropriate LED pin on SW16 (pins 17 - 36).


CFLink
The 5-pin CFLink connector is used to communicate with other CFLink devices on the network.
Pinout
- Isolated Ground
- Data +
- Data -
- Power (9-30V DC)
- Ground
MicroSD
The MicroSD slot is used to expand the on-board memory via MicroSD cards.
Accessories
The SW16 ships with the following accessories:
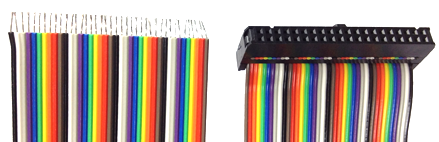
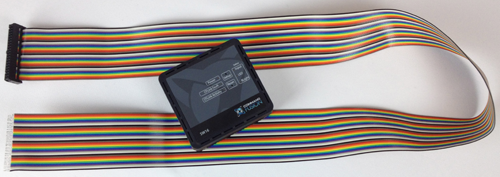
40-pin Ribbon Cable
92cm (36 inch), 40-pin, rainbow-colored ribbon cable.
One end is a standard header connector, ready to plug into SW16.
Other end is stripped and tinned wires, ready for connecting to a button panel.

Factory Reset
For information on how to rest your device to factory settings, see the Device Resetting Page.
hardware/sw16.txt · Last modified: 2017/11/28 06:21 by jarrod